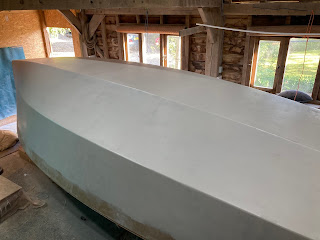
Planking
20/02/2021
Delayed by a week because of a spell of weather too cold to glue in, very happy to have completed this stage though.
Some of the stringers needed to be shaped first, as did the end of the keel floors.
I attached the planks in three steps: 1. topside and inner bottom; 2. chines; 3. outer bottom. This was a mistake, not too sure why I did it that way. B&B designed the kit to be assembled topside-chine-bottoms. It wasn't too much of a drama, but would probably have made shaping easier and quicker, the main issue was with the forward chine planks. Having only two hands, it would have been much easier to clamp the top of them onto the stringer, not possible with the bottom plank already glued in. Taking the planks on and off to make alterations and then glue made it a bit of a bastard.
I did not use the butts to join the planks together as it seem cumbersome and unnecessary, but have now been persuaded to fit them later to reduce flex at the joins.
Freddie


Looking more like a boat everytime! Keep up the good work bro
ReplyDeletehi,
ReplyDeletewhat type of wood did you use for the stringers and around the ply bulkheads
thx tery